Instruments
While opticam was primarily designed for use with the OPTICAM-MX instrument, it includes an interface for compatibility with other instruments. In this notebook, we will explore this interface.
Generating observations from a new instrument
First, let’s generate some observations that are not compatible with the instruments currently supported by opticam. For the data, we’ll generate a 1 s \(U\)-band exposure from an instrument that has a gain of 100 electrons/ADU. We’ll set the time of the observation to 00:00 on January 1st, 2026, with a pointing of 0 RA, 0 DEC:
[1]:
from pathlib import Path

from photutils.datasets import make_100gaussians_image
from astropy.io import fits
import numpy as np


out_dir = Path('out')

image = make_100gaussians_image()

hdu = fits.PrimaryHDU(image)  # image data

hdu.header['FILTER'] = 'U'  # the observation filter
hdu.header['BINNING'] = '1 1'  # the image binning (i.e., 1x1)
hdu.header['GAIN'] = 100.  # the detector gain in adu/photon
hdu.header['EXPTIME'] = 1.  # the exposure time in seconds
hdu.header['RA'] = '0'  # the RA of the image in degrees
hdu.header['DEC'] = '0'  # the DEC of the image in degrees
hdu.header["DATE-OBS"] = f"2026-01-01T00:00:00.000"  # observation timestamp
hdu.header['INSTRUME'] = 'SYNTHETICAM'  # name of the instrument
hdu.header['RDNOISE'] = 0.  # the instrument's read noise in electrons/pixel

save_path = out_dir / 'data' / 'simple'  # directory to which image will be saved

# create save directory if it does not already exist
if not save_path.is_dir():
    save_path.mkdir(parents=True)

# save image
file_path = save_path / 'image.fits.gz'
hdu.writeto(
    file_path,
    overwrite=True,
    )
Let’s take a look at one of these images:
[2]:
from astropy.visualization import simple_norm
from matplotlib import pyplot as plt


# get image data from file
with fits.open(file_path) as hdul:
    data = np.asarray(hdul[0].data, dtype=np.float64)

fig, ax = plt.subplots()

im = ax.imshow(
    data,
    norm=simple_norm(data, stretch='log'),
    cmap='Greys',
    origin='lower',
    )

plt.show()
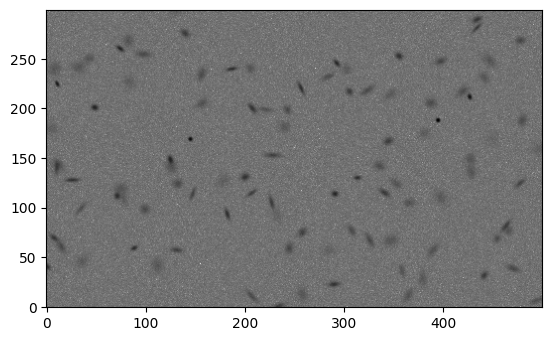
The image looks good.
Let’s see what happens when we try to use the OPTICAM-MX instrument to reduce these data. Before performing reduction with a particular instrument, it’s a good idea to call the instrument’s run_checks() method. This method takes a path to an image and runs a series of checks to ensure that the data are consistent with those produced by the instrument:
[3]:
import opticam


instrument = opticam.OPTICAM_MX()
instrument.run_checks(file_path)
[OPTICAM] Checking instrument OPTICAM_MX.
[OPTICAM] ERROR: OPTICAM_MX.exptime_kw (EXPOSURE) is not a valid header keyword for file /tmp/tmpczx0sqcu/out/data/simple/image.fits.gz extension 0.
[OPTICAM] ERROR: OPTICAM_MX.dateobs_kw (UT) is not a valid header keyword for file /tmp/tmpczx0sqcu/out/data/simple/image.fits.gz extension 0.
[OPTICAM] ERROR: OPTICAM_MX.pixel_scales does not contain a corresponding value for the camera None.
[OPTICAM] ERROR: Failed to parse the MJD of the image due the following exception: "Keyword 'UT' not found.". This is likely due to an incorrect keyword being passed to dateobs_kw and/or your images do not give timestamps in FITS format. In the latter case, you will need to define a custom instrument with a custom get_mjd() method. See https://opticam.readthedocs.io/en/latest/_executed/instruments.html#Defining-an-instrument-from-the-opticam.Instrument-base-class for details.
[OPTICAM] WARNING: OPTICAM_MX.dark_curr_kw (DARKCURR) is not a valid header keyword for file /tmp/tmpczx0sqcu/out/data/simple/image.fits.gz extension 0. If no dark current is listed in the image headers, you will need to use a `opticam.DarkNoiseCorrector` instance to correct for dark noise. See https://opticam.readthedocs.io/en/latest/_executed/applying_corrections.html#Dark-noise for details.
[OPTICAM] OPTICAM_MX failed 4 checks.
[OPTICAM] OPTICAM_MX triggered a warning during 1 check. Warnings may be ignored provided their caveats are satisfied.
In this case, we can see that we have several errors, and one warning:
The first error is caused by
OPTICAM_MXusing a different header keyword for the image’s exposure time. Typically, the keyword “EXPTIME” is used to identify the image’s exposure time; this is the case for these data. However,OPTICAM_MXuses the “EXPOSURE” keyword instead.The second error is again caused by a header keyword mismatch, this time for the timestamp keyword. Typically, the keyword “DATE-OBS” is used to identify the image’s timestamp; this is the case for these data. However,
OPTICAM_MXuses the “UT” keyword instead.The third error is due to the data using the \(U\)-band filter, which is not supported by
OPTICAM_MXand therefore has no corresponding pixel scale.The final error is related to the second error: the Modified Julian Date (MJD) of the image cannot be inferred because of the timestamp keyword mismatch between these data and
OPTICAM_MX.The warning is due to these data not containing a “DARKCURR” keyword in the header.
opticamcan use the dark current value (represented by the header keyword “DARKCURR”) to infer and subtract the dark noise from the image. If this keyword does not exist, then dark noise can be removed using aDarkNoiseCorrectorinstance instead (see the corrections tutorial for more details). This warning can therefore be ignored in this case.
There are also a number of other issues with using OPTICAM_MX that didn’t result in any errors being raised. Let’s look at OPTICAM_MX to see what the instrument represents:
[4]:
print(instrument)
OPTICAM_MX(location=<EarthLocation (-2352558.38786513, -4940313.54119147, 3271528.71037222) m>, pixel_scales={'1': 0.1397, '2': 0.1406, '3': 0.1661}, binning_kw='BINNING', camera_kw='INSTRUME', dark_curr_kw='DARKCURR', dateobs_kw='UT', dec_kw='DEC', exptime_kw='EXPOSURE', filter_kw='FILTER', gain_kw='GAIN', ra_kw='RA', read_noise_kw='RDNOISE')
We can see that OPTICAM_MX has a predefined position, a dictionary of pixel scales for each possible filter, a read noise value, and a number of header keywords. Many of these parameters are likely not be representative of our new instrument. Notably, location and read noise values. The location of the instrument is used when applying Barycentric corrections, and the read noise is used to calculate the total photometric error. Our new instrument therefore needs to redefine many of these
parameters for accurate results.
There are two ways to define a new instrument. The simplest is to generate a configuration file template, edit the necessary values, and then use that configuration file to define a new instrument. This works well provided the instrument adheres to the conventional FITS header keywords (discussed in more detail below) and represents values in FITS format. If this is not the case, then you will need to define your instrument as a class that inherits from the opticam.Instrument base class.
Defining an instrument from a configuration file
In this case, our data use conventional FITS header keywords and all values are given in FITS format. Explicitly:
The corresponding filter is given by the “FILTER” keyword.
The image binning is given by the “BINNING” keyword.
The detector’s gain value is given by the “GAIN” keyword in electrons/ADU.
The corresponding exposure time is given by the “EXPTIME” keyword in seconds.
The corresponding RA is given by the “RA” keyword.
The corresponding DEC is given by the “DEC” keyword.
The corresponding timestamp is given by the “DATE-OBS” keyword in FITS format (YYYY-MM-DDTHH:MM:SS.sss).
If any of these values were given by different keywords or were in different units/formats, then it would be necessary to define the instrument using a custom class instead of from configuration file.
To create a configuration file, it is suggested to generate and then edit a configuration template. Configuration templates can be generated using the generate_instrument_json_template() function. This function takes a directory path and writes an instrument_template.json file to that directory:
[5]:
opticam.generate_instrument_json_template(out_dir)
Let’s take a look at the contents of this template:
[6]:
import json


with open(out_dir / 'instrument_template.json', 'r') as file:
    config_dict = json.load(file)

for k, v in config_dict.items():
    print(k)
    print(v)
    print()
longitude
0.0

_longitude_description
The East longitude of the observatory in degrees.

latitude
0.0

_latitude_description
The latitude of the observatory in degrees.

height
0.0

_height_description
The height of the observatory in meters.

pixel_scales
{'filter_1': 0.0, 'filter_2': 0.0}

_pixel_scales_description
The pixel-scale in arcsec/pixel for each filter.

read_noise_kw
RDNOISE

_read_noise_description
The header keyword that corresponds to the detector's readout noise in electrons/pixel.

binning_kw
BINNING

_binning_kw_description
The header keyword that corresponds to the binning mode.

dark_curr_kw
DARKCURR

_dark_curr_kw_description
The header keyword that corresponds to the detector's dark current in electrons/pixel/s.

exptime_kw
EXPTIME

_exptime_kw_description
The header keyword that corresponds to the exposure time in seconds.

filter_kw
FILTER

_filter_kw_description
The header keyword that corresponds to the image filter.

gain_kw
GAIN

_gain_kw_description
The header keyword that corresponds to the detector's gain value in electrons/ADU.

dateobs_kw
DATE-OBS

_dateobs_kw_description
The header keyword that corresponds to the image's timestamp in ISO 8601/FITS format (i.e., YYYY-MM-DDTHH:MM:SS[.sss]). If your instrument does not give timestamps in this format, you will need to define the instrument with a custom get_mjd() method. See https://opticam.readthedocs.io/en/latest/_executed/instruments.html#Defining-an-instrument-from-the-opticam.Instrument-base-class for details.

ra_kw
RA

_ra_kw_description
The header keyword that corresponds to the image's RA in units of hour angle. If your instrument does not give the RA in units of hour angle, you will need to define the instrument with a custom get_sky_coord() method. See https://opticam.readthedocs.io/en/latest/autoapi/opticam/instruments/index.html#opticam.instruments.Instrument.get_sky_coord for details.

dec_kw
DEC

_dec_kw_description
The header keyword that corresponds to the image's DEC in units of degrees. If your instrument does not give the DEC in units of degrees, you will need to define the instrument with a custom get_sky_coord() method. See https://opticam.readthedocs.io/en/latest/autoapi/opticam/instruments/index.html#opticam.instruments.Instrument.get_sky_coord for details.
As we can see, the template lists a number of parameters that can be configured, including descriptions for each parameter. In practise, one would probably edit this template in their preferred text editor. For demonstrative purposes, however, I will edit the dictionary in this notebook.
For this example, I’ll ignore the location parameters (longitude, latitude, and height), as well as the read noise, since these values vary on an instrument-by-instrument basis. The only parameter that needs changing to prevent errors is pixel_scales, since the exptime_kw and timestamp_kw parameters of the template are already set to the conventional “EXPTIME” and “DATE-OBS” values, respectively:
[7]:
config_dict['pixel_scales'] = {
    'SYNTHETICAM': 1.0,  # 1.0 arcsec/pixel
    }
Let’s save this edited config file under a new name:
[8]:
with open(out_dir / 'new_instrument_config.json', 'w') as file:
    json.dump(
        config_dict,
        file,
        indent=4,
        )
Now we can use this file to create our instrument using the from_json() method of opticam.Instrument. This method takes either a path to a config JSON file, or a config can be passed directly:
[9]:
# using the saved config file
new_instrument = opticam.Instrument.from_json(file_path=out_dir / 'new_instrument_config.json')

# using the config dictionary
new_instrument_alt = opticam.Instrument.from_json(config=config_dict)

new_instrument == new_instrument_alt
[9]:
True
[10]:
assert new_instrument == new_instrument_alt
Let’s take a look at our new instrument and check it’s using the correct values:
[11]:
print(new_instrument)
Instrument(location=<EarthLocation (6378137., 0., 0.) m>, pixel_scales={'SYNTHETICAM': 1.0}, binning_kw='BINNING', camera_kw='INSTRUME', dark_curr_kw='DARKCURR', dateobs_kw='DATE-OBS', dec_kw='DEC', exptime_kw='EXPTIME', filter_kw='FILTER', gain_kw='GAIN', ra_kw='RA', read_noise_kw='RDNOISE')
Looks good!
New let’s run the instrument checks for this new instrument:
[12]:
new_instrument.run_checks(file_path)
[OPTICAM] Checking instrument Instrument.
[OPTICAM] WARNING: Instrument.dark_curr_kw (DARKCURR) is not a valid header keyword for file /tmp/tmpczx0sqcu/out/data/simple/image.fits.gz extension 0. If no dark current is listed in the image headers, you will need to use a `opticam.DarkNoiseCorrector` instance to correct for dark noise. See https://opticam.readthedocs.io/en/latest/_executed/applying_corrections.html#Dark-noise for details.
[OPTICAM] Instrument sucessfully passed all checks.
[OPTICAM] Instrument triggered a warning during 1 check. Warnings may be ignored provided their caveats are satisfied.
No more errors! We still have a warning about the dark current keyword, but we can safely ignore this for now.
As noted above, creating instruments from a configuration template works well provided the instrument follows the convetional FITS header structure. Now let’s take a look at what to do if this is not the case:
[13]:
from astropy.time import Time

image = make_100gaussians_image()

hdu = fits.PrimaryHDU(image)  # image data

hdu.header['FILTER'] = 'I'  # the observation filter
hdu.header['BINNING'] = '2x2'  # the image binning
hdu.header['GAIN'] = 500.  # the detector gain in adu/photon
hdu.header['EXPOSURE'] = 1.  # the exposure time in seconds
hdu.header['RA'] = '12 30 49.4'  # the RA of the image in degrees
hdu.header['DEC'] = '+12 23 28.0'  # the DEC of the image in degrees
hdu.header['INSTRUME'] = 'SYNTHETICAM'  # the instrument (synthetic camera)
hdu.header['RDNOISE'] = 0.  # the instrument's read noise in electrons/pixel


fits_time = f"2026-01-01T00:00:00.000"  # observation timestamp
mjd_time = float(np.asarray(Time(fits_time, format='fits').mjd))  # convert time from FITS format to MJD
hdu.header['DATE-OBS'] = mjd_time

save_path = out_dir / 'data' / 'custom'  # directory to which image will be saved

# create save directory if it does not already exist
if not save_path.is_dir():
    save_path.mkdir(parents=True)

# save image
new_file_path = save_path / 'image.fits.gz'
hdu.writeto(
    new_file_path,
    overwrite=True,
    )
These new data are very similar to the previous example, but replace the “EXPTIME” keyword with “EXPOSURE”, and store the image’s timestamp in MJD format instead of the conventional FITS format.
Let’s look at the header of this image:
[14]:
header = fits.getheader(new_file_path)
print(repr(header))
SIMPLE  =                    T / conforms to FITS standard
BITPIX  =                  -64 / array data type
NAXIS   =                    2 / number of array dimensions
NAXIS1  =                  500
NAXIS2  =                  300
EXTEND  =                    T
FILTER  = 'I       '
BINNING = '2x2     '
GAIN    =                500.0
EXPOSURE=                  1.0
RA      = '12 30 49.4'
DEC     = '+12 23 28.0'
INSTRUME= 'SYNTHETICAM'
RDNOISE =                  0.0
DATE-OBS=              61041.0
Predictably, these new data will fail with both OPTICAM_MX and our newly created instrument:
[15]:
instrument.run_checks(new_file_path)
[OPTICAM] Checking instrument OPTICAM_MX.
[OPTICAM] ERROR: OPTICAM_MX.dateobs_kw (UT) is not a valid header keyword for file /tmp/tmpczx0sqcu/out/data/custom/image.fits.gz extension 0.
[OPTICAM] ERROR: OPTICAM_MX.pixel_scales does not contain a corresponding value for the camera None.
[OPTICAM] ERROR: Failed to parse the MJD of the image due the following exception: "Keyword 'UT' not found.". This is likely due to an incorrect keyword being passed to dateobs_kw and/or your images do not give timestamps in FITS format. In the latter case, you will need to define a custom instrument with a custom get_mjd() method. See https://opticam.readthedocs.io/en/latest/_executed/instruments.html#Defining-an-instrument-from-the-opticam.Instrument-base-class for details.
[OPTICAM] WARNING: OPTICAM_MX.dark_curr_kw (DARKCURR) is not a valid header keyword for file /tmp/tmpczx0sqcu/out/data/custom/image.fits.gz extension 0. If no dark current is listed in the image headers, you will need to use a `opticam.DarkNoiseCorrector` instance to correct for dark noise. See https://opticam.readthedocs.io/en/latest/_executed/applying_corrections.html#Dark-noise for details.
[OPTICAM] OPTICAM_MX failed 3 checks.
[OPTICAM] OPTICAM_MX triggered a warning during 1 check. Warnings may be ignored provided their caveats are satisfied.
[16]:
new_instrument.run_checks(new_file_path)
[OPTICAM] Checking instrument Instrument.
[OPTICAM] ERROR: Instrument.exptime_kw (EXPTIME) is not a valid header keyword for file /tmp/tmpczx0sqcu/out/data/custom/image.fits.gz extension 0.
[OPTICAM] ERROR: Failed to parse the MJD of the image due the following exception: Input values did not match the format class fits:
ValueError: Time 61041.0 does not match fits format. This is likely due to an incorrect keyword being passed to dateobs_kw and/or your images do not give timestamps in FITS format. In the latter case, you will need to define a custom instrument with a custom get_mjd() method. See https://opticam.readthedocs.io/en/latest/_executed/instruments.html#Defining-an-instrument-from-the-opticam.Instrument-base-class for details.
[OPTICAM] WARNING: Instrument.dark_curr_kw (DARKCURR) is not a valid header keyword for file /tmp/tmpczx0sqcu/out/data/custom/image.fits.gz extension 0. If no dark current is listed in the image headers, you will need to use a `opticam.DarkNoiseCorrector` instance to correct for dark noise. See https://opticam.readthedocs.io/en/latest/_executed/applying_corrections.html#Dark-noise for details.
[OPTICAM] Instrument failed 2 checks.
[OPTICAM] Instrument triggered a warning during 1 check. Warnings may be ignored provided their caveats are satisfied.
Defining an instrument from the opticam.Instrument base class
To reduce these data, we cannot create a new instrument from a configuration file because the timestamps are not in FITS format. Instead, we need to define a custom class that inherits from opticam.Instrument and implement a custom get_mjd() method:
[17]:
%%writefile custom_instrument.py

import opticam


class CustomInstrument(opticam.Instrument):

    def get_mjd(self, file=None, header=None):

        if header is None:
            header = file.get_header()

        return float(header[self.dateobs_kw])
Writing custom_instrument.py
Due to compatibility issues, routines defined inside of IPython notebooks cannot be used by multiprocessing (used by opticam). To overcome this issue, we have used the %%writefile magic command to write our CustomInstrument class to a temporary module called custom_routines.py, such that it can be imported by multiprocessing. This is required in Python \(\geq\) 3.14.
The get_mjd() method of an Instrument instance takes two inputs: file and header. file will take a `opticam.MEFSlice <https://opticam.readthedocs.io/en/latest/autoapi/opticam/mef_slice/index.html#opticam.mef_slice.MEFSlice>`__ instance, while header will take an astropy.io.fits.Header instance. opticam’s MEFSlice class is used internally to represent a single extension of a multi-extension FITS file (or the only extension of a standard FITS file). This
allows opticam to easily get the header of a FITS HDU by calling the get_header() method of MEFSlice. When called, opticam will only define one of these parameters, depending on whether the image is already open or not, and so both parameters should assume default values (i.e., None). The value returned by get_mjd() should be the MJD of the image as a float.
In this example, the MJD is given by the header, so it can be returned directly. If the header gives the timestamp in an alternative format, it may be convenient to use the `astropy.time <https://docs.astropy.org/en/stable/time/index.html>`__ module to convert it to MJD.
To instance this CustomInstrument, we can again generate and edit a configuration template:
[18]:
from custom_instrument import CustomInstrument

with open(out_dir / 'instrument_template.json', 'r') as file:
    custom_config = json.load(file)

custom_config['exptime_kw'] = 'EXPOSURE'  # change EXPTIME keyword
custom_config['pixel_scales'] = {
    'SYNTHETICAM': 1.0,  # 1.0 arcsec/pixel
    }

custom_instrument = CustomInstrument.from_json(config=custom_config)

print(custom_instrument)
CustomInstrument(location=<EarthLocation (6378137., 0., 0.) m>, pixel_scales={'SYNTHETICAM': 1.0}, binning_kw='BINNING', camera_kw='INSTRUME', dark_curr_kw='DARKCURR', dateobs_kw='DATE-OBS', dec_kw='DEC', exptime_kw='EXPOSURE', filter_kw='FILTER', gain_kw='GAIN', ra_kw='RA', read_noise_kw='RDNOISE')
[19]:
custom_instrument.run_checks(new_file_path)
[OPTICAM] Checking instrument CustomInstrument.
[OPTICAM] WARNING: CustomInstrument.dark_curr_kw (DARKCURR) is not a valid header keyword for file /tmp/tmpczx0sqcu/out/data/custom/image.fits.gz extension 0. If no dark current is listed in the image headers, you will need to use a `opticam.DarkNoiseCorrector` instance to correct for dark noise. See https://opticam.readthedocs.io/en/latest/_executed/applying_corrections.html#Dark-noise for details.
[OPTICAM] CustomInstrument sucessfully passed all checks.
[OPTICAM] CustomInstrument triggered a warning during 1 check. Warnings may be ignored provided their caveats are satisfied.
Alternatively, we could define the instrument by hardcoding the required parameters, which is a bit more convenient for reusing this instrument many times:
[20]:
%%writefile custom_instrument_class.py
from astropy.coordinates import EarthLocation
from astropy.io import fits

import opticam


__all__ = ['CustomInstrumentClass']


class CustomInstrumentClass(opticam.Instrument):

    def __init__(
        self,
        location = EarthLocation.from_geodetic(
            lon=0.0,  # observatory longitude in degrees
            lat=0.0,  # observatory East latitude in degrees
            height=0.0,  # observatory height in meters
            ),
        pixel_scales = {
            'SYNTHETICAM': 1.0,
            },
        exptime_kw = 'EXPOSURE',
        ):

        super().__init__(
            location=location,
            pixel_scales=pixel_scales,
            exptime_kw=exptime_kw,
            )

    def get_mjd(
        self,
        file=None,
        header=None,
        ):

        if header is None:
            header = file.get_header()

        return float(header[self.dateobs_kw])
Writing custom_instrument_class.py
[21]:
from custom_instrument_class import CustomInstrumentClass

custom_instrument_class = CustomInstrumentClass()

print(custom_instrument_class)
CustomInstrumentClass(location=<EarthLocation (6378137., 0., 0.) m>, pixel_scales={'SYNTHETICAM': 1.0}, binning_kw='BINNING', camera_kw='INSTRUME', dark_curr_kw='DARKCURR', dateobs_kw='DATE-OBS', dec_kw='DEC', exptime_kw='EXPOSURE', filter_kw='FILTER', gain_kw='GAIN', ra_kw='RA', read_noise_kw='RDNOISE')
[22]:
custom_instrument_class.run_checks(new_file_path)
[OPTICAM] Checking instrument CustomInstrumentClass.
[OPTICAM] WARNING: CustomInstrumentClass.dark_curr_kw (DARKCURR) is not a valid header keyword for file /tmp/tmpczx0sqcu/out/data/custom/image.fits.gz extension 0. If no dark current is listed in the image headers, you will need to use a `opticam.DarkNoiseCorrector` instance to correct for dark noise. See https://opticam.readthedocs.io/en/latest/_executed/applying_corrections.html#Dark-noise for details.
[OPTICAM] CustomInstrumentClass sucessfully passed all checks.
[OPTICAM] CustomInstrumentClass triggered a warning during 1 check. Warnings may be ignored provided their caveats are satisfied.
While creating custom instrument classes is more advanced than editing a configuration template, it is far more configurable. Additionally, instrument classes only need to be created once, and can then be reused indefinitely (unless the instrument changes the format of its data products). If you write a class for an instrument, we encourage you to consider opening a pull request to merge your instrument into opticam.
Gotchas
Below, we discuss some common problems you might encounter when trying to write a custom Instrument class for your instrument.
My images don’t contain a binning keyword. What should I do?
If your images do not contain a binning keyword, you’ll need to fake it by writing a custom get_binning() method. If your instrument only supports one binning mode, then the get_binning() method can simply return an arbitrary string:
[23]:
%%writefile instrument_without_binning.py
import opticam


class InstrumentWithoutBinning(opticam.Instrument):

    def get_binning(self, file=None, header=None):

        return '1x1'
Writing instrument_without_binning.py
[24]:
from instrument_without_binning import InstrumentWithoutBinning

instrument_without_binning = InstrumentWithoutBinning.from_json(config=config_dict)

print(instrument_without_binning)
InstrumentWithoutBinning(location=<EarthLocation (6378137., 0., 0.) m>, pixel_scales={'SYNTHETICAM': 1.0}, binning_kw='BINNING', camera_kw='INSTRUME', dark_curr_kw='DARKCURR', dateobs_kw='DATE-OBS', dec_kw='DEC', exptime_kw='EXPTIME', filter_kw='FILTER', gain_kw='GAIN', ra_kw='RA', read_noise_kw='RDNOISE')
Like the get_mjd() method, the get_binning() takes one of two inputs: either file or header. In this example, however, neither are needed. The value returned by get_binning() can be any string that uniquely identifies the binning mode used to create the image.
Now let’s generate an image without a binning keyword:
[25]:
image = make_100gaussians_image()

hdu = fits.PrimaryHDU(image)  # image data

hdu.header['FILTER'] = 'U'
hdu.header['GAIN'] = 1.
hdu.header['EXPTIME'] = 1.
hdu.header['RA'] = '12 30 49.4'
hdu.header['DEC'] = '+12 23 28.0'
hdu.header['DATE-OBS'] = f"2026-01-01T00:00:00.000"
hdu.header['INSTRUME'] = 'SYNTHETICAM'
hdu.header['RDNOISE'] = 0.

new_file_path = out_dir / 'data' / 'no_binnning'
hdu.writeto(
    new_file_path,
    overwrite=True,
    )
When we check a previous instrument that would otherwise work:
[26]:
new_instrument.run_checks(new_file_path)
[OPTICAM] Checking instrument Instrument.
[OPTICAM] ERROR: failed to read image binning for file /tmp/tmpczx0sqcu/out/data/no_binnning extension 0 due to the exception "Keyword 'BINNING' not found." This is either due to an incorrect keyword being passed to binning_kw and/or your images do not contain a binning keyword. In the latter case, you will need to define a custom instrument with a custom get_binning() method. See https://opticam.readthedocs.io/en/latest/_executed/instruments.html#My-images-don't-contain-a-binning-keyword.-What-should-I-do? for details.
[OPTICAM] WARNING: Instrument.dark_curr_kw (DARKCURR) is not a valid header keyword for file /tmp/tmpczx0sqcu/out/data/no_binnning extension 0. If no dark current is listed in the image headers, you will need to use a `opticam.DarkNoiseCorrector` instance to correct for dark noise. See https://opticam.readthedocs.io/en/latest/_executed/applying_corrections.html#Dark-noise for details.
[OPTICAM] Instrument failed 1 check.
[OPTICAM] Instrument triggered a warning during 1 check. Warnings may be ignored provided their caveats are satisfied.
We see that an error is raised. With our new instrument, however:
[27]:
instrument_without_binning.run_checks(new_file_path)
[OPTICAM] Checking instrument InstrumentWithoutBinning.
[OPTICAM] WARNING: InstrumentWithoutBinning.dark_curr_kw (DARKCURR) is not a valid header keyword for file /tmp/tmpczx0sqcu/out/data/no_binnning extension 0. If no dark current is listed in the image headers, you will need to use a `opticam.DarkNoiseCorrector` instance to correct for dark noise. See https://opticam.readthedocs.io/en/latest/_executed/applying_corrections.html#Dark-noise for details.
[OPTICAM] InstrumentWithoutBinning sucessfully passed all checks.
[OPTICAM] InstrumentWithoutBinning triggered a warning during 1 check. Warnings may be ignored provided their caveats are satisfied.
We don’t get any errors.
Alternatively, the binning information may be inferrable from other keywords (e.g., NAXIS1 and NAXIS2). In this case, you may want your custom get_binning() method to infer the binning mode from these parameters. This way, opticam will be able to check that all images in a given directory use the same binning mode.
For example, if your instrument has a resolution of 2048x2048, then you can infer the binning mode by dividing the instrument’s resolution by the image resolution:
[28]:
%%writefile instrument_with_inferred_binning.py
import opticam


class InstrumentWithInferredBinning(opticam.Instrument):

    def get_binning(self, file=None, header=None):

        if header is None:
            header = file.get_header()

        x_size = int(header['NAXIS1'])
        y_size = int(header['NAXIS2'])

        # divide instrument resolution by image resolution
        x_binning = 2048 // x_size
        y_binning = 2048 // y_size

        return f'{x_binning}x{y_binning}'
Writing instrument_with_inferred_binning.py
[29]:
from instrument_with_inferred_binning import InstrumentWithInferredBinning


instrument_with_inferred_binning = InstrumentWithInferredBinning.from_json(config=config_dict)
instrument_with_inferred_binning.run_checks(new_file_path)
[OPTICAM] Checking instrument InstrumentWithInferredBinning.
[OPTICAM] WARNING: InstrumentWithInferredBinning.dark_curr_kw (DARKCURR) is not a valid header keyword for file /tmp/tmpczx0sqcu/out/data/no_binnning extension 0. If no dark current is listed in the image headers, you will need to use a `opticam.DarkNoiseCorrector` instance to correct for dark noise. See https://opticam.readthedocs.io/en/latest/_executed/applying_corrections.html#Dark-noise for details.
[OPTICAM] InstrumentWithInferredBinning sucessfully passed all checks.
[OPTICAM] InstrumentWithInferredBinning triggered a warning during 1 check. Warnings may be ignored provided their caveats are satisfied.
My instrument has multiple cameras that use the same filters, what should I do?
If your instrument has multiple cameras that use the same filters, then you’ll have to break the degeneracy by specifying a custom get_camera() method. Like get_binning(), this method parses an image’s header to infer the camera that was used to capture the image; in the simplest case, there would be a “CAMERA” header keyword which labels each camera. In the case of OPTICAM-MX, however, the camera is inferred from the filter since there is no filter degeneracy between OPTICAM-MX’s
cameras.
In this example, I’ll generate images from two different cameras, both of which use a \(U\)-band filter. For clarity, I’ll make the images from the second camera slightly smaller to highlight the difference:
[30]:
image = make_100gaussians_image()

for i in range(3):
    # image from first camera
    hdu = fits.PrimaryHDU(image)  # image data
    hdu.header['FILTER'] = 'U'
    hdu.header['CAMERA'] = '1'  # camera keyword that uniquely identifies the camera used
    hdu.header['BINNING'] = '1x1'
    hdu.header['GAIN'] = 1.
    hdu.header['DARKCURR'] = .1
    hdu.header['EXPTIME'] = 1.
    hdu.header['RA'] = '12 30 49.4'
    hdu.header['DEC'] = '+12 23 28.0'
    hdu.header['DATE-OBS'] = f"2026-01-01T00:00:0{i}.000"
    hdu.header['INSTRUME'] = 'SYNTHETICAM'
    hdu.header['RDNOISE'] = 0.


    save_path = out_dir / 'data' / 'custom_filters'

    # create save directory if it does not already exist
    if not save_path.is_dir():
        save_path.mkdir(parents=True)

    new_file_path = save_path / f'camera_1_image_{i}.fits.gz'
    hdu.writeto(
        new_file_path,
        overwrite=True,
        )

    # smaller image from second camera
    hdu = fits.PrimaryHDU(image[:250, :400])  # image data

    hdu.header['FILTER'] = 'U'
    hdu.header['CAMERA'] = '2'  # camera keyword that uniquely identifies the camera used
    hdu.header['BINNING'] = '1x1'
    hdu.header['GAIN'] = 1.
    hdu.header['DARKCURR'] = .1
    hdu.header['EXPTIME'] = 1.
    hdu.header['RA'] = '12 30 49.4'
    hdu.header['DEC'] = '+12 23 28.0'
    hdu.header['DATE-OBS'] = f"2026-01-01T00:00:0{i}.000"
    hdu.header['INSTRUME'] = 'SYNTHETICAM'
    hdu.header['RDNOISE'] = 0.

    new_file_path = save_path / f'camera_2_image_{i}.fits.gz'
    hdu.writeto(
        new_file_path,
        overwrite=True,
        )
We now have a total of six images taken with two different cameras that use the same filter. When reading these images, we clearly do not want to mix images between cameras since they have different shapes. We therefore need to define an Instrument that can disentagle these images:
[31]:
%%writefile instrument_with_custom_filter.py
from astropy.coordinates import EarthLocation

import opticam


class MulticameraInstrument(opticam.Instrument):

    def __init__(
        self,
        location = EarthLocation.from_geodetic(
            lon=0.0,
            lat=0.0,
            height=0.0,
            ),
        pixel_scales = {
            '1': 1.0,  # pixel scale for camera 1
            '2': 1.1,  # pixel scale for camera 2
            },
        ):

        super().__init__(
            location=location,
            pixel_scales=pixel_scales,
            )

    def get_camera(self, file_path=None, header=None):

        if header is None:
            header = fits.getheader(file_path)

        # return the unique camera identifier
        return str(header['CAMERA'])
Writing instrument_with_custom_filter.py
Let’s use this instrument in a Reducer to see it in action:
[32]:
from instrument_with_custom_filter import MulticameraInstrument


custom_filter_reducer = opticam.Reducer(
    out_directory=out_dir / 'reduced' / 'custom_filters',
    data_directory=out_dir / 'data' / 'custom_filters',
    instrument=MulticameraInstrument(),
    show_plots=True,
    finder=opticam.DefaultFinder(npixels=32),
    background=opticam.DefaultBackground(25),
    )

custom_filter_reducer.create_catalogs(overwrite=True)
[OPTICAM] out/reduced/custom_filters not found, attempting to create ...
[OPTICAM] out/reduced/custom_filters created.
[OPTICAM] Scanning data directory: 100%|█████████████████████████████████████████████████████████████████████████████████████████████████████████████████████████████████████████████████|[00:00<00:00]
[OPTICAM] Checking instrument MulticameraInstrument.
[OPTICAM] MulticameraInstrument sucessfully passed all checks.
[OPTICAM] Parsing file headers: 100%|████████████████████████████████████████████████████████████████████████████████████████████████████████████████████████████████████████████████████|[00:02<00:00]
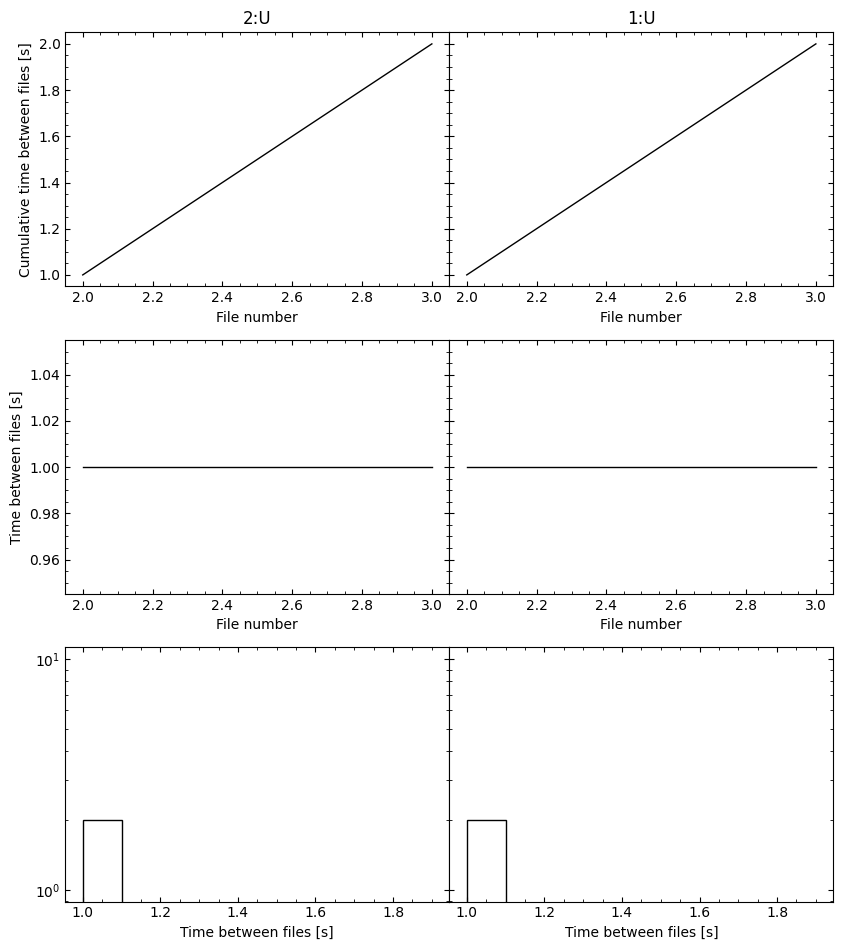
[OPTICAM] Large time gap detected between camera_2_image_2.fits.gz and camera_2_image_0.fits.gz (1.000 s compared to the median time difference of 0.000 s). This may cause alignment issues. If so, consider moving all files after this gap to a separate directory.
[OPTICAM] Large time gap detected between camera_2_image_1.fits.gz and camera_1_image_1.fits.gz (1.000 s compared to the median time difference of 0.000 s). This may cause alignment issues. If so, consider moving all files after this gap to a separate directory.
[OPTICAM] Binning: 1x1
[OPTICAM] Filters: 2:U, 1:U
[OPTICAM] 3 2:U images.
[OPTICAM] 3 1:U images.
/home/zac/Documents/University/PhD/Repos/opticam/opticam/utils/data_checks.py:227: UserWarning: Large time gap detected between camera_2_image_2.fits.gz and camera_2_image_0.fits.gz (1.000 s compared to the median time difference of 0.000 s). This may cause alignment issues. If so, consider moving all files after this gap to a separate directory.
  warnings.warn(string)
/home/zac/Documents/University/PhD/Repos/opticam/opticam/utils/data_checks.py:227: UserWarning: Large time gap detected between camera_2_image_1.fits.gz and camera_1_image_1.fits.gz (1.000 s compared to the median time difference of 0.000 s). This may cause alignment issues. If so, consider moving all files after this gap to a separate directory.
  warnings.warn(string)
[OPTICAM] Plot saved to /tmp/tmpczx0sqcu/out/reduced/custom_filters/diag/header_times.pdf.
[OPTICAM] Creating source catalogs.
[OPTICAM] Aligning 2:U images: 100%|█████████████████████████████████████████████████████████████████████████████████████████████████████████████████████████████████████████████████████|[00:01<00:00]
[OPTICAM] [OPTICAM] Done.
[OPTICAM] [OPTICAM] 3 image(s) aligned.
[OPTICAM] [OPTICAM] 0 image(s) could not be aligned.
[OPTICAM] Aligning 1:U images: 100%|█████████████████████████████████████████████████████████████████████████████████████████████████████████████████████████████████████████████████████|[00:01<00:00]
[OPTICAM] [OPTICAM] Done.
[OPTICAM] [OPTICAM] 3 image(s) aligned.
[OPTICAM] [OPTICAM] 0 image(s) could not be aligned.
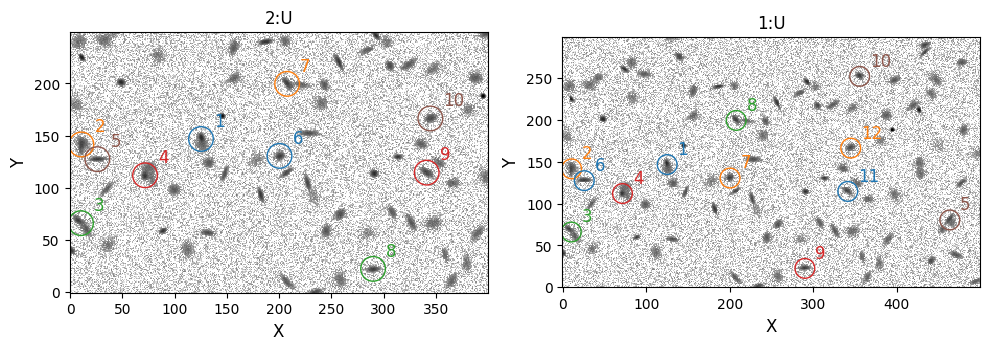
[OPTICAM] Plot saved to /tmp/tmpczx0sqcu/out/reduced/custom_filters/cat/catalogs.pdf.
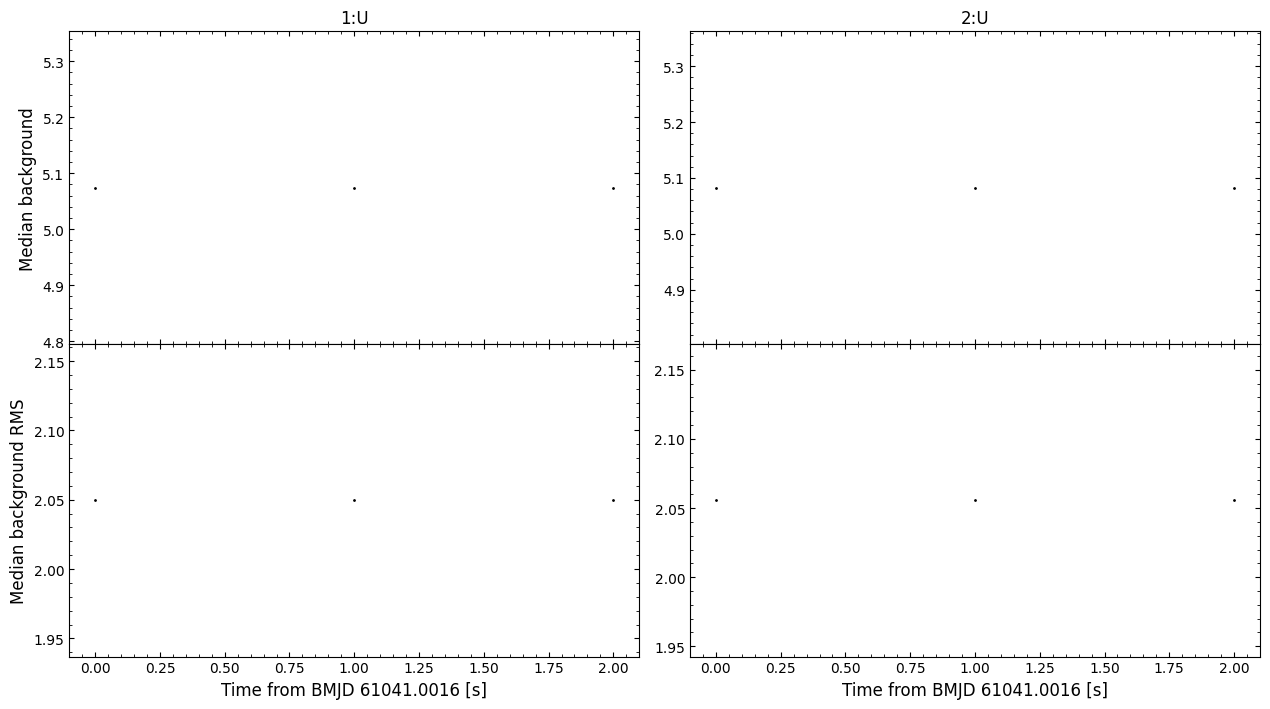
[OPTICAM] Plot saved to /tmp/tmpczx0sqcu/out/reduced/custom_filters/diag/background.pdf.
As we can see, the two cameras have been uniquely identified thanks to our custom get_filter() method.